Throughout the system you will encounter different buttons and options depending where you are in the system. Here's an overview of how each of those will work.
View Options
On schedule pages such as Master Schedule, My Schedule, and Availability, you can select the best view to fit your preference or what view works best for how you work. Clicking on different drop down buttons and selecting one their options will change how your schedule looks. When you set these, they will be that way when you return to the page later, even after logging out. There are subtle difference when viewing the system on mobile devices. Here are some of the ways you can change how your schedule pages look.

- Month - Shows data for the calendar month. (for example, January or March)
- 2 Week - Shows data for the next 2 calendar weeks. Depending on how you have your site options set up, the first day might be Sunday or Monday. So the calendar will show either Sunday through Saturday or Monday through Sunday.
- Week - Shows data for the calendar week. Depending on how you have your site options set up, the first day might be Sunday or Monday. So the calendar will show either Sunday through Saturday or Monday through Sunday.
- 5 Day - Shows data for the next five days, starting with the date selected. (usually "today")
- 3 Day - Shows data for the next three days, starting with the date selected. (usually "today")
- 1 Day - Shows data for only the day selected.
- Sitter Day - Shows a one day view, broken down by sitter
- Sitter Week - Shows a week view, broken down by sitter
- Table - Displays your schedule in a table format, that has headers and additional information that can be expanded. This view looks similar to how a spreadsheet may be set up.
- List - Displays your schedule in a simple list format. It does not have headers, But rather sections which are each day of your schedule. It does not display additional information without expanding each row as needed.
NOTE: Table and List views do not have the Month, Week, etc. options as they are essentially continuous views. You can, however, set the number of records per page, or select specific data from drop downs when they are available.
Other Views
There are a few other views that you'll come across. They will only be available in certain areas of the system.
- Profile - Seen within client profiles provides the detail for each client on a 'client per page' format.
- Birthdays - This view is used in the Pet Profiles section so you can easily see what pet birthdays are coming up.
- Route - this Master Schedule only view will allow you to map each day's schedule
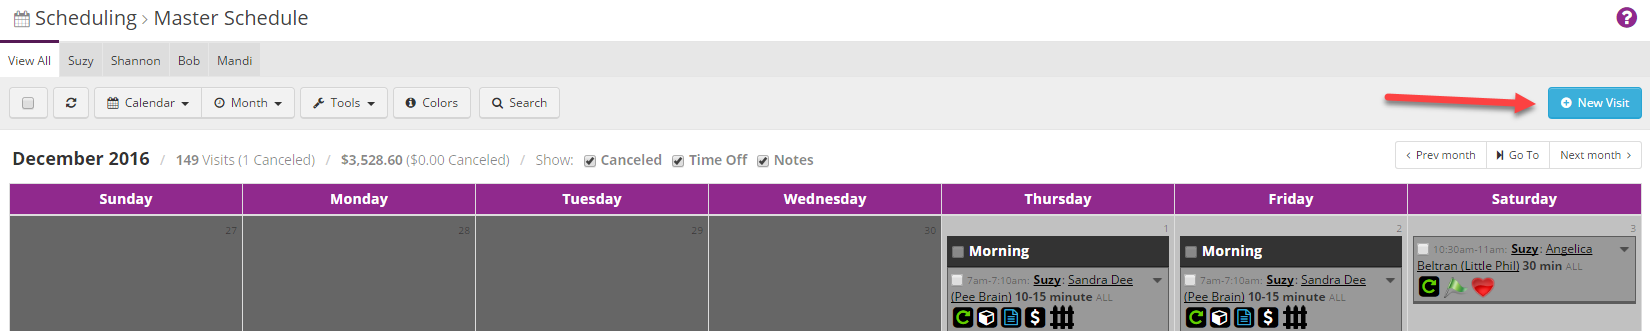
Adding or Creating New Data (ie. New Clients, New Pets, New Visits etc.)
Depending on where you are at in the system, adding new data such as clients, pets, visits, invoices etc is done so easily just by clicking the NEW button. It is usually found in the top right hand corner of each area.
Editing Data
There are a few ways to edit existing data such as current clients, or visits. In most circumstances you'll use the single item edit function from a drop down menu. In other circumstances you'll use the item selection check boxes to make multiple changes (as described in "Other Important Functions" below).
Single Item Edit
Depending on where you are in the system, the single item actions menu will slightly different. Here are examples.
Example 1: Calendar View

Example 2: Table View

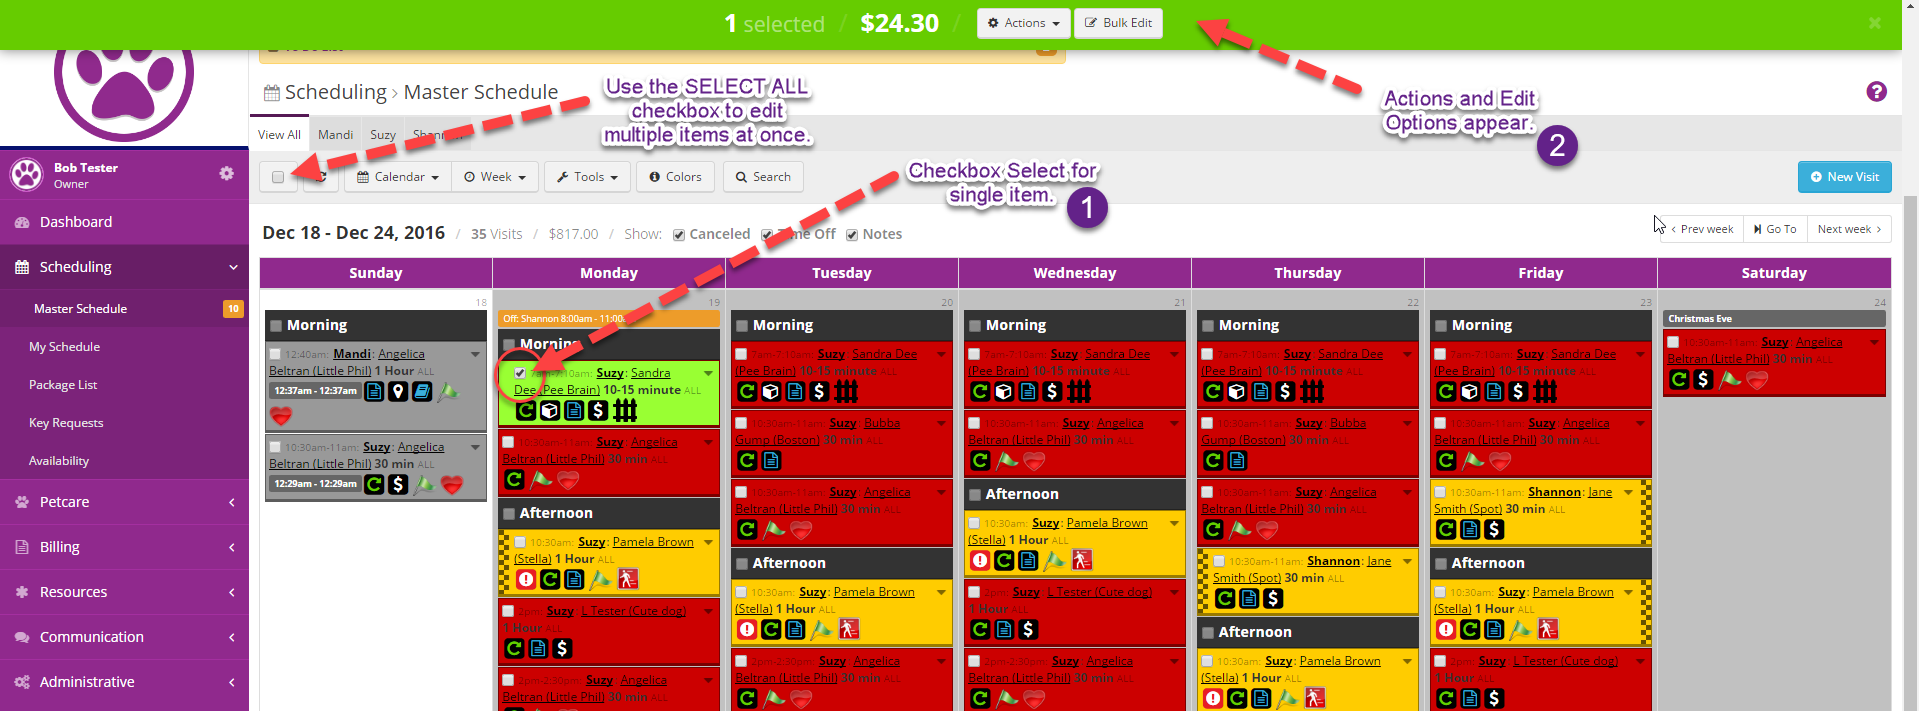
Selecting and Bulk Editing
Some views include additional actions like SELECT, and SELECT ALL. Edit can be found in most drop down menus related to a specific item, such as a visit.
Clicking on the the checkbox of a single item will open the ACTIONS and BULK EDIT menu.
Clicking on the SELECT ALL checkbox will also open the ACTIONS and BULK EDIT menu, but you'll be editing the data in ALL of your selections.
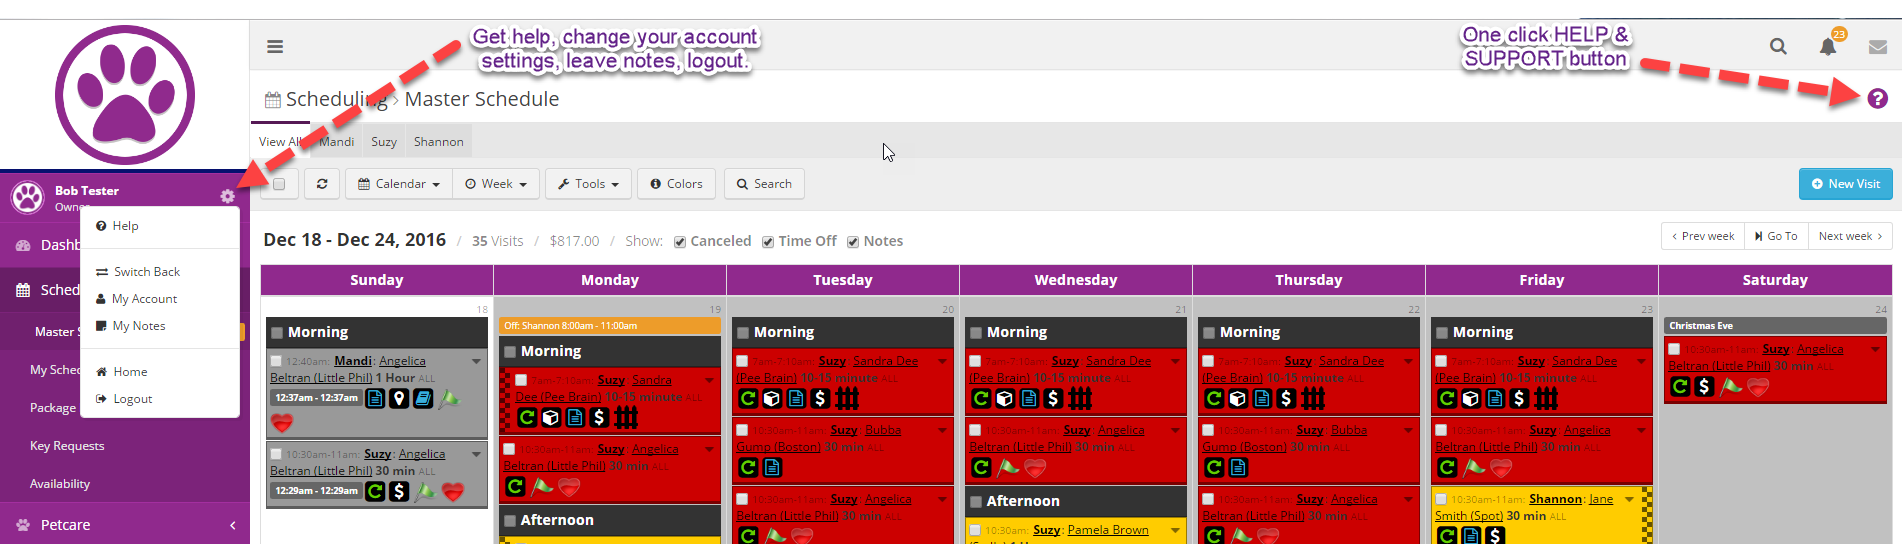
Settings and Support
If you need to make changes to your account, leave notes for yourself, or get help with the system, you can do so in just a click or two.
Keyboard Shortcuts (desktop only)
- CTRL-SHIFT-SPACE = add New
- CTRL-SHIFT-S = Search
- CTRL-ENTER = Save item (when your cursor is in a non-editor text field)
- CTRL-SHIFT-Left = previous page
- CTRL-SHIFT-Right = next page